Thursday, December 22, 2016

Dragon shelf bracket with hook

Dragon shelf bracket with hook

So this is a different take on the previous shelf bracket concept. The basic shelf bracket can be adapted to just about any theme. Using a scroll saw you can cut out just about any character for that one-of-a-kind bookshelf. Again I recommend that it be cut out of a material similar to Masonite or plywood that does not have a wood grain. This is so the tail can withstand the extra stress that may be placed on it. If you're only planning to hang lightweight items off of the tail then I would go ahead and use 1/2" or 3/4" wood stock. Again the amount of weight that the hook can withstand greatly depends on how the grains in the wood run. The shelf on top of the bracket will set high enough to protect the horns from being broken off or snagging items on them.
     I created this design for someone I know that loves to read fantasy books and I hope that you will love this design as much as I do. 


Please be sure to check out our web site www.nevadacrafter.com and also http://craft44.blogspot.com/ and http://nevadacrafter.blogspot.com/

Wednesday, December 21, 2016

Shelf bracket with hook

This is a free pattern from Nevadacrafter.com

The following is a free pattern for a shelf bracket with hook.
This pattern is pretty much self-explanatory. The flower design is optional and can be created by either wood-burning, carving or scroll saw.
Brackets are screwed to the wall and to the shelf. The hook gives you a place to hang things such as a purse.
Be sure to use appropriate screws and fasteners. As always the pattern can be adjusted to fit the size of your project. Long shelves should consider using more than just to brackets, if you're looking to hang heavy items from the hook it is recommended that the bracket be cut out of material that does not have wood grains, which can cause weak points in the hook.
For this and other crafting ideas be sure and visit www.nevadacrafter.com

Thursday, October 6, 2016

Spooky Ghost Novelty

    As kids we have all played with magnets and how two like poles such as + and +will repel one another. I have used magnets in many projects since then and in a lot of different ways.
    In this project we are hiding magnets in a friendly looking ghost that hangs from a hangar over a wooden base with another hidden magnet in the base. We make sure that each magnet repels each other before gluing in place.
    As the ghost swings back and forth over the base, the ghost will move to avoid the magnet or magnets that are in the base. As a result the ghost does not move back and forth as you would think. I like using rare earth magnets because they are stronger and can be smaller and easier to hide. More than one magnet can be placed in the base to give additional and more unpredictable movements, just make sure all the magnets repel one another.
    This is one of my favorite novelties to create during the holidays. It makes a great conversation piece and easily amuses people who are not familiar with magnetism and how it works.

    As always this is a Nevada crafter.com project and has not been tested or created to scale. Adjustments and refinements to the project may be necessary.
It is presented here only as a form of entertainment.

[CAUTION: this project may contain small parts and is not intended for small children as these parts may present a choking hazard] 

Friday, September 23, 2016

Halloween flying bat mobile

Halloween flying bat mobile

 If it is done right it's a pretty cool project. A light tug on the pull string and the bat will appear to be flying. It makes a really cool decoration and center of conversation . The entire project is held together by chords or heavy string and works something like a marionette. NOTE: it should not be hung over a crib and should be kept out of reach of small children as the chords and strings can become a choking hazard!
   First drill your preliminary holes and attach the wings to the body using your chosen cord or string. Making sure that the corridor string you choose is heavy enough to support the weight of the project. Start with a ring or loop at the top, add four strings of equal length. (Length is about 18 to 24 inches )  Run two strings on each side of the bat through slits cut in to the dowel and use a dowel to keep your strings separated. You should now have two strings on each side of the dowel for the wings. The most difficult thing about a project like this is finding the right balance points. Adjusting the weight in the pull cord is usually the easiest but in some cases you may have to move the cord holes that support the bat. The two outer holes can be moved closer to the body if the body is too heavy or move them slightly further out if the wings are too heavy. Before painting and finishing your project it is best to do a trial run with everything assembled temporarily. If it is done correctly it should be balanced as shown above in the small diagram. Holes drilled in the wrong place can be filled in with putty or glue and sawdust. Be sure and take notes of where the correct balance holes are if you intend to make more than one .The body can be sanded down to remove some weight or a thinner wood stock can be used. Basically the body should equal the weight of the two wings. Metal washers can be sandwiched In between two pull cord bats or a thicker one that is hollowed out if extra weight is needed for the body. The pull cord bat is actually optional and should be included with the total body weight if used.
    Once you have your project balanced you can then proceed to paint your project. Keep in mind to use an equal number of coats of paint for both the wings and the body so as not to throw your weights off.
    One of the nice things about this project as it uses a single color paint with only a few highlights as desired. Can use plastic animal eyes to make it more realistic or paint a couple of thumbtacks.

 NOTE: If you want to make a quick trial mobile, it can be made out of cardboard or poster board.

    In the poster board bat I had to move the holes for the wings out further to accommodate the width of the pencil length dowel. I used paperclips on the wings to adjust the balance. This way once I have the weight correctly adjusted I could simply insert the paperclips into the foam part of the wings Instead of using the small bat on the pull cord I used beads as a counterweight. That is so I can add or subtract however many beads I needed to. I also used beads on the underside of the wings to keep the embroidery thread from pulling through.
     The size and type of material will always cause you to make adjustments in the location of the holes, the weights in the wings, and the counterbalance on the belly (pull cord beads). This is why you completely assemble your project. Paint, eyeballs and anything else you add to the project also adds weight.
    Once you have made all your adjustments and have decided on all the materials that you're going to use, it is a good idea to make notes and adjustments to your pattern. That way any copies you build in the future will be simple and easy.


    As always it should be noted that this prototype design is the property of Nevada crafter.com it is free to the public to use so long as it is not put into mass production. (Anything over 500) please also note that this post is copyrighted and Nevada crafter does not allow reprint, redistribution or republishing without permission from Nevada crafter.com

Tuesday, August 23, 2016

Cloud rainbow sign with whirligig umbrella - sign is optional

This is a cloud rainbow whirligig umbrella that can be used as a business sign or address sign. The whirligig part of this is unusual in that it is a hanging whirligig. You must make sure to mount the fan blades of the umbrella at an angle for it to work properly. As with many of my other designs, this is a concept design and has not been tested or prototyped as of yet. The design is set up so that you can scale it to whatever size you need. Keep in mind that if you make the whirligig too large it may not work mechanically. The eye screws may have to be mounted differently than shown to offset the weight of the umbrella and rainbow. The left eye screw should probably be on the rainbow above the umbrella. You may also want to scale the umbrella down in size.
    It should also be noted that the umbrella by its self is a whirligig and can be used alone without the cloud and rainbow.

Friday, August 5, 2016

hanging hand whirligig sign

Hanging Hand Whirligig Sign

Signs can be the cornerstone of any business success. Attracting customers attention can sometimes be a daunting task, as you are usually competing with hundreds of other signs.
      One of the main things that I've learned in the 40 years of being in business for myself is that the only thing that gets people's attention is the oddity that stands out from everything else.
    Motion is usually key, as this taps into primitive survival brain functions. The brain cannot ignore such things until it identifies what it is that's moving. 
     I learned very early on that whirligigs make some of the best signs. They don't always scale up to the larger sizes, but because of their motion and uniqueness they don't need to. In many cases people will actually stop and turn around to see what it is. Their curiosity gets the better of them until they know what it's about. That is why smaller signs work well in conjunction with larger signs. The larger sign states the name of the business, the smaller sign acts like a fishing lure directing them to the front door or whatever else you want their attention on. 
    Now with all this said I also learned that after seeing the sign for several months people became accustomed to it and begin to largely ignoring it. It is at this point that I change out the sign entirely and from time to time rotating different signs and maintain their interest and attention. 

Friday, July 29, 2016

Steampunk whirligig / weathervane by Nevada crafter.com

    This is probably the most complicated whirligig design that I have created thus far. And as such I would like to stress that this is an untested design that may be better suited as a decoration indoors rather than an actual functioning whirligig or weathervane.
    The reason for the complexity is that it uses several different materials that are not usually incorporated into a whirligig. The design is a steam punk style and uses everything from wire, tubing and even wiremesh.
    I think it would look really cool using a copper mesh for the netting. The balloon itself is a simple oval 1/4" cut out painted gray to resembled the dirigibles used during the Victorian era. The guide wires or ropes will need to be some type of rigid wire such as brass welding rod or even bicycle spokes to support the balloon. Steam generator in the middle can be part wood but also could be just as easily fashioned out of a metal cut out. Tubing could be substituted with copper or brass wire. The steam gauge itself can be a sliced dowel painted silver and then applying a decal for the gauge and numbers. The ship body is cut out of 1/2" to 5/8" wood stock. The propeller is actually quite simple, in that it is a dowel using beads as a spacer and cap.
    The rest of the design is left open for your own imagination, such as the type and style of anchor that you wish to use or whether you would want to add any ports. I personally thought about drilling a hole in the side and then mounting glass marbles as port windows. You could probably use pipe fittings or even Sculpey clay for copper or brass fittings.

   If you have any suggestions or ideas please feel free to post them in the comment section. I'd be very interested in hearing people's input so I can make improvements on the design or future designs.

Please be sure and check out our website www.nevadacrafter.com and also check out our other blogs.
http://nevadacrafter.blogspot.com/

http://craft44.blogspot.com/

http://3dpenideas.blogspot.com/


Monday, July 25, 2016

Top View Dragonfly

Top View Dragonfly

This is a public domain free to use dragonfly pattern created by Nevada crafter.com 

    This is a basic design that could be used or adapted to just about any project. From woodworking to 3-D pen's this simple design could be turned into anything from a whirligig to a simple stained-glass ornament,
or even a wire framed pendant.
    Basic designs like this are a good starting point and can be added onto with other designs or used simply by itself. 

Monday, July 18, 2016

Seagulls And Fruit Weathervane

Seagulls And Fruit Weathervane

The design can be used with any fruit or object you like and the birds need not be seagulls. It is basically presented to demonstrate a concept that involves using wind drag instead of a tail fin to control the direction of the weathervane. The number of birds is up to you. I recommend that you use spring steal so it does not loose it's shape and will give the birds more action in the wind.

Basic types of wind art and instruments

Description of basic wind art and instruments

This poster is intended to give a basic breakdown of the differences between the various wind art and instruments. This is also to clarify what I am talking about in the various blogs and the various terms that I use to describe what I'm working on. 


    Weather Veins are probably the oldest form of wind instruments. As time went by they evolved into more decorative forms and sometimes doubled as lightning rods as they were usually mounted on the tops of houses and constructed out of metal. 
    From this evolution arose the whirligig which not only functioned as a wind directional device but as a mechanical animatronic. Usually depicting some comic scene or action such as an old lady washing clothes or a mule kicking a prospector. Some whirligigs have also been adapted to create thumpers to chase away moles and gophers. Generally constructed out of wood there are not too many surviving antique whirligigs.
     Wind spinners or pinwheels are also among some of the oldest wind devices but were created more as a child's toy rather than decoration. When spinners are generally mounted on a short stick about 12 inches long or shorter. More recent designs are in the shapes of flowers and used as yard decorations.
     Weather stations are among the recent instruments created as a tool to monitor whether and meteorological events. Their sophistication now includes electronics that enable them to transmit information wirelessly, which allows them to be placed in remote areas and the unattended. 
    Kinetic art is the most recent addition to wind art and is generally constructed of metal. These works of art use the wind to create movement that is almost an optical illusions. They may also include wind chimes and solar lighting. Their design is more closely related to the wind spinners or pinwheels that children play with but on a much grander scale. They are generally omnidirectional which means they will operate no-matter the direction the wind is blowing.

This is a creation of www.nevadacrafter.com copyrighted 2016 not for reprint or republication without permission from Nevada crafter.com.

For other money making craft ideas be sure to checkout our other Blogs.


Saturday, July 16, 2016

Whale whirligig / weathervane

Whale whirligig / weathervane

This original design was conceived for use with the wood from fruit and vegetable crates that grocery stores discard, but due to the use of pesticides and other chemicals that may have been used on the wood I no longer use this wood source. The Woodstock that I use is 1/2" or 5/8 " and can be scaled to what ever size you need. 
    For the water spout I give you 3 options, although I used the copper wire the most as it was more cost-effective. 
    [Note] The difference between a whirligig and a weathervane is that a whirligig usually has a mechanical or electrical action to it, whereas a weathervane is usually just a figurine that tells the direction of the wind. A weathervane will also usually position the pivot post so that the figure( animal, person, object) is moving in the direction of the wind and not in the opposite direction. If you wish to use this as a weathervane simply move the pivot post back so that the whale will pivot as if he is traveling in the direction of the wind.

This is a simple basic design that can be modified numerous ways but it was made simple so as to increase profits and to allow me to compete with other crafters. The design can be spray-painted with one or two colors and not a lot of detail and still look good. 
    The fiber-optic version is a recent concept that I have not had a chance to fully work out. So if you attempt to create it please keep in mind that you may have to experiment with it in order to get it to work right. This version also increases the cost of materials which you may not be able to recoup even though all of materials for the lighted water spout can be found at dollar stores. The LED light is cannibalized solar yard light and the fiberoptics is cannibalized from a battery operated light.
    Still, it is a good project to challenge your skills at whatever level you happen to be at. The whales design was originally cut from a single piece of wood with a coping saw, which was a lot of work to just cut out the tail and very imprecise. At the time a coping saw is all I had, but when I later invested in a scroll saw I found it to be a worthwhile investment. A scroll saw makes quick work of it in less than a couple minutes.

Tuesday, July 12, 2016

Tall Sailing Ship Whirligig

Tall Sailing Ship Whirligig

This is a concept design created by Nevada crafter.com Is mainly intended for entertainment purposes
and should not be considered a blueprint or plan.
However the concept is sound and with trial and error
it may be possible to construct a working model.
It is designed to be mounted on a fence post
and to work in light to moderate winds. Winds in
excess of 30 miles an hour may require smaller sails
or propellers or a more rigid mast. It is suggested that
each side of the sails be painted a different color,
such as white on one side and black on the other
so as to accentuate the spinning motion of the sails.
(Note this concept is not done to scale and its
size may need to be enlarged or decreased.)

Be sure and check out our website Nevada Crafter .com 
And our other blogs


Toolbox Giftbasket

Toolbox Giftbasket

for
Him or Her


    Enlarge this design to whatever size you need.The length can be adjusted to however long you need. I recommend recessing the dowel handle or even drilling a hole all the way through for the dowel. Then hold in place with screws and or glue. Make sure you use the appropriate length screws and glue for the bottom and sides. Sand the sides of the project so that you can stain the wood afterward, but painting or decorating the box would probably also work. 
    Once you're finished with the project all you have left to do is to fill it with your favorite goodies for your favorite person and you will have a gift they will not soon forget. I love this project because it is such a versatile gift that can be given to him or her. It leaves them with something to use after they have consumed the goodies inside and could be used as a toolbox or even a planter for the front porch.

Be sure to checkout our web site www.nevadacrafter.com and our other blogs http://craft44.blogspot.com/ and http://nevadacrafter.blogspot.com/

Thursday, June 30, 2016

Bumblebee wiggler and flower yard ornament

Bumblebee wiggler and flower yard ornament


This is a free to use concept created by Nevada crafter .com
It is an untested concept pattern and some adjustments and alterations may be necessary. Please be sure and check out our other blogs and website.

Craft 44

Nevada Crafter Blog

Wednesday, June 29, 2016

Dragonfly weathervane

Dragonfly weathervane concept design


This is an untested design, so adjustments and alterations may be required. It is a basic design that could be altered so that a propeller could be added if you wanted to turn it into a whirligig. The pivot pin has been mounted as far forward as possible so that the dragonfly is always flying into the wind. It may be necessary to move the pivot pin slightly back for added strength depending on average wind speeds. Here in Nevada wind speeds can gust upwards of 60 miles an hour or more and may require that the wings be mounted more flat or even a downward slant to prevent dragonfly from being blown off the pivot post.
Although this design is presented for entertainment purposes it could quite easily be used as a pattern to create the actual weathervane.

Be sure and check out our website and other blogs for additional ideas and concepts.

www.nevadacrafter.com

http://craft44.blogspot.com/

http://nevadacrafter.blogspot.com/

Sunday, June 19, 2016

Saturday, June 18, 2016

Free toddler bubble push car pattern

Free toddler bubble push car pattern
This is a free public domain pattern by Nevadacrafter.com


The car length is about 8 1/2 to 9 inches. The slab wheels are 2 inches or larger so they are not a choking hazard. 

Friday, June 17, 2016

FREE Mandala pattern

     Although some of my patterns I do reserve copyrights, this one in particular I decided to make public domain. This particular pattern is free to use however you see fit. It is one of my first attempts at a Mandala.


Monday, May 23, 2016

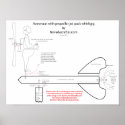
Rocket astronaut jet pack whirligig

Rocket astronaut jet pack whirligig design

This is a concept design by  Nevadacrafter.com  
As I've stated before this is an untested design. But I wanted to include something new with this design, so I've made available a 16 x 12 print out that can be purchased from the following. 

Astronaut jet pack whirligig design poster
Astronaut jet pack whirligig design poster by Nevadacrafter
View Conceptual Posters online at zazzle

    The astronaut can be made fixed mount, but I think it adds additional character if he can wobble back and forth. The tail propeller is optional, but be sure and mount your propeller blades at an angle. The design can be modified in a number of ways, just use your imagination and give it a try.

Monday, May 16, 2016

Ladybug push car for toddlers


     This is a simple push car design for toddlers. As this is an item that may be handled by a toddler, you must make sure that all parts are non-toxic, no sharp edges, no toxic glues or finishes and nothing is small enough to swallow. If the spots on the body are to be drilled instead of wood burned make sure the holes are too large or too small for little fingers to get stuck in.

Be sure and checkout our web site www.nevadacrafter.com hear you will also find links to our other blogs and youtube videos.

Thursday, May 12, 2016

Flower kaleidoscope


The concept behind this design is to give a kaleidoscope effect. Each of the flower propellers rotate in opposite direction. If two drastically opposite colors are used such as black and white or yellow and blue, the effect is enhanced. The design of the propellers could also be applied to other designs in different combinations. Also keep in mind that this is not a pattern, it is a design concept. This way the design does not restrict you to a rigid pattern that can only be used for the one design.

Be sure and check out our website www.nevadacrafter.com here you will find links to our other blogs, YouTube videos and other posts. We hope that this post is informative and inspires you to create your own designs. Happy crafting from the Nevada Crafter.

Monday, May 9, 2016

Black widow spider silhouette

Black widow spider silhouette


black widow silhouette Note:

This image is impregnated with visible and encoded watermarks.

black widow spider silhouette
This design is copyrighted by Nevadacrafter.com 2016 and not to be reprinted, redistributed or republished in any other format without the consent of Nevada crafter.com. This pattern is free for you to use for your personal use only. And not to be used for mass production of any kind. 

 The silhouette makes a great Halloween cut out for a yard decoration, business sign or if you're just into the spiders.

Wednesday, April 27, 2016

Contest for Nevada Crafter month of May

Nevada Crafter month of May contest

For your chance to win these 3 glass lampwork charms, great for making necklaces , bracelets or wine glass charms, all you have to do is follow or like us on one of the following.

Free Patterns and Ideas Blog

Craft 44 blog

Nevadacrafter blog


For future contests be sure and check out these sites and http://www.nevadacrafter.com

we are a Free Nevada Crafter online magazine

Monday, April 25, 2016

Free to use, cat silhouette

Cat silhouette 

Note: 

This image is impregnated with visible and encoded watermarks.
This design is copyrighted by Nevadacrafter.com 2016 and not to be reprinted, redistributed or republished in any other format without the consent of Nevada crafter.com. This pattern is free for you to use for your personal use only. And not to be used for mass production of any kind. 


This is a simple cat silhouette from the previous post. It has been slightly modified to be used as a silhouette by itself.  As before this image is copyrighted by Nevada crafter.com and is not to be used for republication. It is published here only as a pattern for personal non-commercial use only.

Friday, April 22, 2016

Cat Watching Flower Whirligig Concept

Cat Watching Flower Whirligig Concept


Note: make sure flower petals are angled to form a propeller. It should also be noted that this is not a pattern but a concept as the drawing was not done to scale.


Wednesday, April 20, 2016

Back and forth motion for whirligigs, steampunk and other mechanical devices

This is a mechanical gear assembly that could be used in a whirligig or other device to give you a back-and-forth motion. As the bottom gear turns it reaches a point where there are no teeth, which allows the upper gear to slip back momentarily as a result of the spring pulling it back in place. Please keep in mind that this is a conceptual idea, not a pattern and it has not been tested. It is presented here for entertainment and conceptual idea purposes only.

This is similar to a electromechanical device I found in old slot machines, back before computers. Although in the slot machine it was used to activate an electrical switch, much like a person pushing a button. The mechanics of this gear assembly could be used in numerous ways, such as simulating a person pushing a button, oars on a rowboat, or any other application that requires a back-and-forth or repeat motion. It is important to note that this assembly may have to be constructed out of a heavy-duty material (such as plastic or metal ) depending on how much wear and tear the device would go through. Make sure that the upper gear has room on the slider to move back and forth and that on the lower gear that the teeth are positioned properly. This setup will take some trial and error in order to figure out the best position for the lower gear. The spring on the upper gear should be of light weight and may also require testing of different lengths and strengths. If the spring is too heavy a propeller on a whirligig would not be able to turn the gear. As I stated before this is a conceptual idea and in theory it should work, but as with any new idea it is going to take a great deal of trial and error to figure out what works.

Note: this configuration could also be used vertically for the up-and-down motion of butterfly wings.

Friday, April 15, 2016

Carnival Ferris wheel whirligig

Carnival Ferris wheel whirligig

Note this is a concept and not a pattern. All copyrights are reserved by Nevadacrafter.com you are free to use for personal use only, not for reproduction, reprint, or republication.


This concept has not been done to scale and has not been tested and as such functionality is unknown. Theoretically, it should work but may require adjustments and further testing.


The idea is to use a double wheel as the Ferris wheel with the propeller blades inside the Ferris wheel. The cars on the Ferris wheel may require additional weight in order to get them to hang and rotate properly. The shaft that the propeller rotates on probably should be a metal screw or bolt. Be sure to use graphite as your lubricant so it does not freeze in the winter. Graphite from pencil lead may be substituted. The center hub is a 1"or 2" wheel in which the propeller blades are inserted into. The upper edges of the blades are slotted into the Ferris wheel and act as spokes for the Ferris wheel. The dowels that the cars rotate on also act as further reinforcement for the Ferris wheel itself. 
    Please leave constructive suggestions and ideas in the comments section. 

For this and other craft ideas please checkout our other sites and be sure to subscribe.
www.nevadacrafter.com

http://craft44.blogspot.com/

http://nevadacrafter.blogspot.com/

Nevada Crafter on YouTube

Monday, April 4, 2016

Fairy whirligig / weathervane concept

Fairy whirligig weathervane concept

This is a concept / idea of how the fairy silhouette may be used in creating a whirligig or weathervane. The idea is to use the Fairy as a rudder that will keep the dandelion pinwheel facing the wind. Fairy is positioned so as to give the appearance of her reaching out for the dandelion. This is all set on a standard 12 " X 3/8" X 1 1/4" inch base.

For this and other craft ideas please checkout our other sites and be sure to subscribe.
www.nevadacrafter.com

http://craft44.blogspot.com/

http://nevadacrafter.blogspot.com/

Nevada Crafter on YouTube

Wednesday, March 30, 2016

Whirligig music box, Or a whirligig that plays a music box.

This is a whirligig prototype concept project in the making that plays a music box.

I have thought about using a rubber grommet to regulate the speed of the propeller, but that would mean the music box would most likely only play at certain wind speeds and would still not prevent it from playing too fast. There is the possibility of using a flywheel but not exactly sure how that would work out. If any of you out there have any ideas please post them in the comment section and I will try to respond in a timely manner. from Nevadacrafter.com Thank you

For this and other craft ideas please checkout our other sites and be sure to subscribe.
www.nevadacrafter.com

http://craft44.blogspot.com/

http://nevadacrafter.blogspot.com/

Nevada Crafter on YouTube

Tuesday, March 29, 2016

Fairy Silhouette

Fairy Silhouette

This is a www.nevadacrafter.com pattern. All copyrights reserved to Nevadacrafter.com this pattern is not for reprint or publication without the express permission of Nevadacrafter.com. Nevadacrafter gives free limited permissions to crafters and hobbyists to use this pattern for limited production of 200 silhouettes only for their personal use. This design is not for commercial mass production without negotiating royalties with Nevadacrafter.com

    This design may also be adapted to other projects such as whirligigs and weathervane's. Future posts will demonstrate how this silhouette may be used with whirligigs and whether veins. This is a basic PNG pattern fairy silhouette that can be enlarged to whatever size needed. It can be used as stand alone as yard ornament by attaching wire stakes or it can be enlarged and used as wall ornament.

For this and other craft ideas please checkout our other sites and be sure to subscribe.
www.nevadacrafter.com

http://craft44.blogspot.com/

http://nevadacrafter.blogspot.com/

Nevada Crafter on YouTube

Saturday, March 26, 2016

Blue Heron Silhouette

Blue Heron Silhouette

Limited use pattern for personal use only. Reprinting or publishing this pattern is prohibited. Mass production in excess of 200 without Nevadacrafters permission is prohibited. Nevadacrafter.com reserves all rights and copyrights to this pattern.  

The silhouette can be used as a stand-alone yard ornament or incorporated into a whirligig or weathervane. Please feel free to leave constructive comments or suggestions. We will try to reply within a reasonable time.

For this and other craft ideas please checkout our other sites and be sure to subscribe.
www.nevadacrafter.com

http://craft44.blogspot.com/

http://nevadacrafter.blogspot.com/

Nevada Crafter on YouTube

Tuesday, March 22, 2016

Tap dancing whirligig

Tapping shoes whirligig

Note: tapping shoes whirligig is presented as a concept idea. It has not been done to scale nor has it been tested. Nevada crafter.com does not guarantee that this concept will work and is presented here only for entertainment purposes. Nevada crafter also retains all copyrights and does not allow the reprint publication of this document for the purpose of resale. The whirligig may be used for personal and smallbatch production only. Corporate mass production is not allowed. 


 The alternating cams lift the shoes one at a time and then drops them. The bottle caps on the bottom of the tip of the shoe rattle each time the shoe is dropped making a tap dancing sound. It may be necessary to place a metal bracket under the bottle caps in order to prevent damage  to wood and to add to the sound effect.The shoes are hinged at the back with a small drawer hinge. A small metal bell can be optionally attached for additional sound. The style of the shoe could also be changed to give it a man's shoe opposite a woman's shoe to give it more of an appearance of a couple dancing.The tail fin and propeller are presented only as examples and could be customized to fit the theme as well. As I do not know how noisy this whirligig may be, it may work better as a scarecrow in the garden than a yard ornament.


 The idea for this whirligig came from the love my mother had for tap dancing. As she could not get me to take lessons I hope that this whirligig idea will please her and so I dedicate this post to her.


    For this and other craft ideas please checkout our other sites and be sure to subscribe.
www.nevadacrafter.com

http://craft44.blogspot.com/

http://nevadacrafter.blogspot.com/

Nevada Crafter on YouTube

Saturday, March 19, 2016

Need a puppet kitty cat?

Mechanical puppet kitty cat


The concept puppet kitty cat below presents the inside workings of this design. The proper location of drill holes and pivots points have not been determined. They are approximations and should not be relied on, as this is not a tested pattern. 

The design below are the parts that need to be cut out.


It should be noted that this concept and idea can be adapted for use with a whirligig.

Be sure to leave any constructive comments or suggestions in the comment box.
Also be sure to check out her other blogs and other posts and please subscribe.

Revisions may be made at a later date

For this and other craft ideas please checkout our other sites and be sure to subscribe.
www.nevadacrafter.com

http://craft44.blogspot.com/

http://nevadacrafter.blogspot.com/

Nevada Crafter on YouTube

Friday, March 18, 2016

Light up propeller concept for whirligigs and craft projects

 The following whirligig design is presented as a concept, 

not a pattern.

This is a concept that I'm currently working on, and one that I have created many variations of. My background in electronics is quite frequently incorporated into the designs of my whirligigs and whether veins. As it is quite easy to add either solar lights or attach a small motor to the propeller to generate electricity. Adding lights is the easiest thing, but I have also added electromechanical to various projects with mixed results. The first and foremost challenge is to design something that will withstand environmental conditions such as wind and rain.

For this and other craft ideas please checkout our other sites and be sure to subscribe.


Tuesday, March 15, 2016

Washers for whirligigs

Washers for whirligigs


FOR SAFETY REASONS NEVER USE THESE WASHERS TO REPLACE PARTS ON COMMERCIAL PRODUCTS. 

Always use the manufacturer's recommended replacement parts.


    Nylon washers are not very cheap, but I have found an alternative that cost next to nothing, helps the environment and works almost as well. 
    One of the things that I do on a yearly basis is to do preventative maintenance on my whirligigs and weathervane's. With all the moving parts and high winds, there is a lot of wear and tear on these mechanical wonders. What I found out is metal on wood wears out the most, so I use a lot of plastic or nylon washers. Although washers are not the most expensive part to a whirligig, they can cut into your profits.

    I know that this blog is for patterns, but I couldn't help, but share this money-saving and environmentally friendly up_cycling of plastic jugs. As for the patterns, I simply invested in an assortment of metal washers to use as a template for the various size washers that I use in my whirligigs. After all for a couple of bucks worth of cheap metal washers, I now have a set of templates that are worth the investment and will never wear out. I could've very easily used a compass to draw the circles, but I wanted something that was more consistent with actual washers.

    
(Be sure to use the appropriate safety goggles and other safety equipment when using rotary tools)

    I have found almond milk jugs and other opaque or heavier jugs seem to make the better washers. Anyhow, using a metal washer as my template and a black marker to trace around the metal washer, I create my patterns. Usually, I take the time to make several hundred at a time, so I have washers on hand for later. Then I simply rough cut them using heavy-duty utility scissors, dollar store kitchen scissors or a Dremel with a fine tip rotary cutting blade. (An X-Acto knife on a cutting board will also work as well.) I then finish the washer by sanding the edges or dragging a knife blade crossways against the grain to remove any ragged edges. A Dremel with an abrasive bit also works very well.

For those of you who like to do things the hard way I have included the following photo as a pattern.
Now keep in mind these washers will not necessarily take the place of a heavy-duty nylon washer and will most likely biodegrade over time if exposed to sunlight.

For this and other craft ideas please checkout our other sites and be sure to subscribe.
www.nevadacrafter.com

http://craft44.blogspot.com/

http://nevadacrafter.blogspot.com/

Nevada Crafter on YouTube

Friday, March 11, 2016

Cow and horse silhouette

Cow and horsesilhouettes with weathervane and whirligig

Silhouettes are often an easy way of creating a weathervane or whirligig without having to spend a lot of time on painting detail, which can be time-consuming and ultimately eating into your profits. These silhouettes can be substituted or added to the previous Western windmill whirligig or weathervane project concept, or simply used the alone.

For this and other craft ideas please checkout our other sites and be sure to subscribe.
www.nevadacrafter.com

http://craft44.blogspot.com/

http://nevadacrafter.blogspot.com/

Nevada Crafter on YouTube

Thursday, March 10, 2016

Western windmill_horses weathervane / whirligig concept

windmill with horses weathervane / whirligig concept

Note: This is a conceptual rendering and not a plan or pattern, All copyrights reserved Nevadacrafter 2016


The silhouette can be cut out of Masonite or 8 inch Woodstock. Should be noted; the silhouette is not the best and a different one may be used. The silhouette will act as a rudder unless it is fix mounted. A short tube with nail on a stick mounted under windmill can act as your pivot.
Pivot stick and assembly

For this and other craft ideas please checkout our other sites and be sure to subscribe.
www.nevadacrafter.com

http://craft44.blogspot.com/

http://nevadacrafter.blogspot.com/

Nevada Crafter on YouTube

Wednesday, March 9, 2016

Fisherman in a Dory weathervane or whirligig

Lighthouse with fisherman weather vain or whirligig concept.


{The following is a concept, not a pattern, and has not been tested. Actual construction may require adjustments be made and not all variations may work. Nevada crafter reserves all copyrights and reserves the right to make changes or revisions as needed. }

For this and other craft ideas please checkout our other sites and be sure to subscribe.
www.nevadacrafter.com

http://craft44.blogspot.com/

http://nevadacrafter.blogspot.com/

Nevada Crafter on YouTube

Wednesday, February 3, 2016

DIY Drawing Compass

DIY Drawing Compass

A drawing compass can come in handy, but most are the size kids use in school. I quickly found out that here locally, there were no large compasses to be had. Not only do they come in handy for my own art work, but there is some demand for the compasses them selves. So I present the following approximate pattern and photos of the one I made. 


(Please note: pattern may not be exact or to scale and some adjustments may need to be made. The pattern is presented as an approximate to the original and is intended as more of a guide. It should also be noted that the pattern may need adjusting depending on materials used and thickness of wood or other materials used.)

Note: 1/4 " wood was used

I used glue to hold and position the mechanical pencil and metal point. I then used wire to hold them in place while the glue set and left them in place to add strength. Any point can be used for the fulcrum, such as a nail, push pin, ect. 
Of course when I am making them for sale, I take care to use much nicer material, such as brass nails, ect. The size circle you can draw depends on how long or how many joints. A second screw and wing nut in the middle of the fulcrum, but I find it just as easy to just make the compass bigger. 
    I hope this idea is of help to the crafters and artists out there that need to make big circles and great art. Thank you for taking the time to read my blog and please check out our other blogs and subscribe. Please feel free to make constructive comments or suggestions.


For this and other craft ideas please checkout our other sites and be sure to subscribe.
www.nevadacrafter.com

http://craft44.blogspot.com/

http://nevadacrafter.blogspot.com/


Nevada Crafter on YouTube

Tuesday, January 5, 2016

Butterfly Multiuse pattern

The following is a multiuse butterfly pattern. It is designed so that it can be used on fabric as well as in woodworking, or other craft projects. The design can be copied for personal use on fabric as a outline for a butterfly pattern that would be filled in with fabric paints. It can also be traced onto wood and then cut out with a scroll saw. He can then be painted and used as a yard ornament.

Feel free to use this pattern for your personal use only. Do not reproduce or redistribute this pattern. Do not use pattern in mass production or in commercial use. If you wish to purchase copyrights or limited production copyrights they are available from Nevadacrafter.com.


For this and other craft ideas please checkout our other sites and be sure to subscribe.
www.nevadacrafter.com

http://craft44.blogspot.com/

http://nevadacrafter.blogspot.com/

Nevada Crafter on YouTube