Translate

Showing posts with label weathervane. Show all posts

Saturday, April 7, 2018

Gargoyle Whirligig or Weathervane

Gargoyle Whirligig or Weathervane

This is a concept idea and not intended as a pattern or plan. It has not been tested and may not work as suggested and further modifications may be required to make it work. The concept is to create a whirligig or weathervane with a gargoyle chasing or playing with a metal sphere.  Do not use metal disc for the propeller as they may fly off in high winds becoming a hazard. Instead we recommend using metallic paint on wood. Do not for get to angle the propeller blades so they catch the wind. If the propeller does not catch enough wind, a different design may have to be used such as mounting the gargoyle and propeller above the horizontal pivot.
(Note) the difference between a whirligig and a weathervane is that a weathervane only shows the direction of the wind, whereas a whirligig has moving parts powered by a propeller,or may also consist of just a propeller.

Please be sure and checkout our other blogs and web site for crafting ideas.

Friday, April 6, 2018

Flying Dragon whirligig

Flying Dragon whirligig concept

           This is a concept idea and not intended as a pattern or plan. It has not been tested and may not work as suggested and further modifications may be required to make it work. The concept is to attach the wings to the dragon’s body with hinges of some type and then attach metal rods to the outer edges of the wings. The opposite ends of the metal rods would have some type of bead attached to the end so that it could freely ride an offset wheel which would be turned by a propeller. As the wheel turns it rises and falls lifting and lowering the dragons wings.

Please be sure and checkout our other blogs and web site for crafting ideas.

Thursday, April 5, 2018

Goldfish Whirligig


This is a concept idea and not intended to be a pattern. The design is not done to scale and has not been tested.  There are a number of ways this concept could be used and the number of fish is only limited to how long or how much space you have on the whirligig. The concept is intended to show how a wire crank shaft might be used. The propeller may have to be scaled up in order to get enough power to turn the crank and the propeller it’s self could be designed with goldfish at the ends of the propellers blades. Be sure to use washers and nut on crank shaft to keep shaft in place as it turns.
Thank you for checking us out.
Be sure to check out our other sites for more crafting ideas.

Monday, April 2, 2018

UFO Solar Whirligig Idea

Sometimes all you need is a good idea.

            I had seen these globe shaped solar lights and used them in may other projects and after watching a great sci-fi movie realized they could be used to make a UFO. 
I began by cutting a circle out of a 2 x 6 scrap wood on my band saw, but I think I will use 1" of or thinner wood stock next time and glue pieces together as the thick cuts were somewhat difficult.
Dividing the circle in half with a pencil line.
And then using a belt sander I began beveling the top and bottom edges into a flying saucer shape.

I drilled a hole for the solar light to fit in and carved with the Dremel tool a recess for the solar light set in,
so it would sit flush is in the following photo.

Then using 2 x 2's created the pivot and vein part to mount the UFO on top of.
I used a screw that had no upper threads in the vertical mount, cut off the head, and using a drama rounded the top of the screw.

On the horizontal pivot I placed a brass tube in a hole I drilled slightly off center and then placed a BB in the tube to act as a bearing.
So I had something that looked like the following. 


I took a plastic florescent tube covering and cut a short piece to cover the black shaft of the solar light.
I painted the black shaft of the UFO solar light with florescent green paint and the inside of the clear tube with glitter.


Cannibalizing a second regular solar light, I used a Dremel saw blade to cut solar light carefully apart without disconnecting any wires. I cut a channel in the horizontal 2 x 2 and fitted the solar cell there and mounted the rest of the components(LED, battery) under the clear tube. But I found this to be too bright and later painted the inside of the tube with more florescent green paint to dull the brightness of the light.


I will later mount some type of tail fin and cow being abducted as a counterbalance to the UFO.
 As you can see I'm still not quite getting the effect that I wanted and in a future design I will most likely use cascading LEDs for the tractor beam at the bottom of the UFO.
So far the project has gone well and I will update this post when it is completed.


Not sure which one I like, so posted both. UFO on the back side is just a tail fin cutout to act as rudder in the wind. Cow is also just a cutout 1/8" stock or thicker. A propeller could aslo be added to lighted end.


Thursday, July 20, 2017

Who's catching who - Fisherman and giant fish whirligig

Who's catching who - Fisherman and giant fish whirligig


    In this whirligig concept we used an optional second pivot. Depending on pivot placement, boat shape, ect boat should wobble back and forth giving the impression the fisherman is fighting the fish.
    Unlike previous designs the bottom pivot is set directly in the fish and there is no need for a runner board or a tail fin. You do however need to make sure that the fish is cut out of 6/8" or thicker wood stock so it can handle the stress of the pivot.
    There is a small optional propeller at the aft end of the boat. The boat motors is actually part of the boat for added strength when adding the propeller.
    As always, keep in mind, this is only a concept design and has not been prototyped or tested. Adjustments in the locations of pivots and and types of materials used may have to be made.
Other considerations that need to be made are what types of weather the whirligig or weathervane will be exposed to. When designing a whirligig for areas like Nevada, smaller propellers may be preferable because of gusty high winds. Whereas along the coast where you're more apt to have constant steady breezes, larger propellers may be incorporated.
    I hope that this concept design inspires you to create your own designs. For more concept and patterns please be sure and check out our website at www.nevadacrafter.com

Also be sure to check out our following blogs for money making craft ideas.
https://craft44.blogspot.com/

https://nevadacrafter.blogspot.com/

Saturday, July 15, 2017

Double Pivot Bumble Bee Whirligig / Weathervane

Double Pivot Bumble Bee Whirligig / Weathervane  

As with any double pivot system, the location of the pivot determines how much action or how little action in the pivot takes place. Moving the pivot for the bumblebee forward or back will determine how much back and forth movement the bumblebee makes. If the pivot is placed in the middle of the bumblebee, the bumblebee will have a tendency to spin. You will also want to take into consideration that the bumblebee needs to clear the tail fin as it moves back and forth.
     The legs and antennae are made from wire and the eye can be a simple bicycle reflector. Tail fin can also be reflectors, cutouts, wood burned etching, or simply painted design. Of course as always the design can be scaled up or down depending on size whirligig that you need.  The bumblebee propeller wings are small, which is indicative of a bumblebee which has disproportionate wings to body size. The black body and orange stripes are whatever size and width that you desire.
    The overall design is a basic double pivot whirligig/weathervane. The concept can be used on any design or theme. I hope you enjoy this design concept, feel free to give positive creative feedback.
Always be sure to check out our website www.nevadacrafter.com as well as our other blogs.

Blog links
https://craft44.blogspot.com/

https://nevadacrafter.blogspot.com/

Have a great time crafting and thank you for checking us out.

Monday, January 16, 2017

Basic Pivot for Whirligig or Weathervane

Basic Pivot for Whirligig or Weathervane

    In this post I wanted to go into more detail about the whirligig or weathervane pivot and how it is put together. The diagram below is intended as a basic guide and can be adjusted in size or scale according to the size whirligig or weathervane that you're creating. 

    For basic demonstration purposes this is a basic 12 inch pivot for whirligig or weathervane. Were using a heavy screw with threads that only go halfway up and a non-tapered shaft. The type of screw head does not matter as it will be cut off once the screw is installed in the vertical mounting board. Screw the screw into the vertical mounting board just enough to cover the threats. Making sure to keep shaft of screw vertical. It may be necessary to drill a pilot hole to help keep the screw straight, as this is what your project is going to pivot on. This should leave the upper half of the screw without threats exposed. Then using a Dremel tool (with appropriate safety goggles and other protective equipment) use a cutoff blade to cut off the screw head and a grinding bit to either round the top of the screw shaft or grind a concave dimple. Once you've completed your vertical board with pivot it is time to create the horizontal part of your pivot. 
    One of the important things to take in consideration before drilling a hole is the metal or plastic sleeve that will fit inside the hole. The metal or plastic sleeve should fit tightly in the hole but the screw should fit closely but not so tight as to inhibit the upper part of the pivot from rotating. Any wobbling in the rotation of the upper pivot will simply create excessive wear and erratic movements.
    At the bottom of the hole place a 1/4" hunting shot (slingshot ammo found in the sporting good section) or a small ball bearing, or BB depending on the size hole being used for the vertical shaft. The basic reason for placing the metal ball at the bottom of the hole is to prevent metal rubbing against wood and to reduce friction as the upper pivot rotates. Using a metal ball that is slightly larger than the metal or plastic sleeve and then placing the metal sleeve on top of the metal ball in the hole will help keep the metal ball in place.
     Using wood stock that is approximately 1/2" X 1/2" X 12" long measure 3 inches from one end and drill a hole.  Where you position the whole will depend on how you want the pivot to react to the wind. The closer you position the hole to the center, the more erratic the pivot will act. The closer to the end you position the whole the greater the force that will be applied not only to the pivot reacting to the wind, but also to the pivot itself. I have found that a quarter of the total distance gives a good balance to the pivot and does not put excessive strain on the pivot. 
    Once you have the metal ball and sleeve in place the two parts to the pivot should be ready to go together. You can put a small amount of graphite lubricant at the bottom of the hole before you put the two together. 

There you have it a basic pivot to mount your whirligig or weathervane on. For this and other ideas please be sure and check out our website www.nevadacrafter.com and our blog's at http://craft44.blogspot.com/ and http://nevadacrafter.blogspot.com/ and http://3dpenideas.blogspot.com/
    If you have any questions please be sure and post those questions to the blog and I will try to answer them as promptly as I can.

Friday, January 13, 2017

Spacewalking astronaut and space capsule weathervane

Spacewalking astronaut and space capsule weathervane


   So the idea or concept was to create an astronaut walking in space. At first the design seemed to be simple, but as I researched it more I quickly realized that I could take the design to whatever level of detail that I wanted. For presentation purposes I have chosen a simpler design than what an actual astronaut and space capsule would look like. It may be possible to create lifelike replicas but as this project would be exposed to the elements I chose to keep it simple. This way if the weathervane should become damaged it would be easy to make repairs. 
    I chose a weathervane design to minimize moving parts but also decided to add what is referred to as a wobble effect. This is done by adding a part of the design to a spring, metal band, or spring wire. In this case I'm using spring steel wire as the astronauts tether. The bouncing around motion that the astronaut will give in the wind will add to the illusion of someone actually walking in space. 
    The space capsule is actually cut out of 1/2" wood stock and the lower flame is notched so as to fit over the side part of the pivot. The thicker Woodstock allows you to make a more secure attachment to the pivot and the overlapping flame at the bottom will give it a more three-dimensional appearance. It should also be noted that I have intentionally left off the country of origin insignia on the side of the space capsule. This is so that you can put your own insignia on the side of the space capsule such as an American flag or some other countries insignia. 
    The pivot itself is a basic design and you can refer to the pivot design at the bottom of the following post. windmillhorses-weathervane-whirligig 


For this and other great ideas be sure and check out our website www.nevadacrafter.com
and some of our other blogs such as
http://craft44.blogspot.com/
and
http://nevadacrafter.blogspot.com/


Tuesday, August 23, 2016

Cloud rainbow sign with whirligig umbrella - sign is optional

This is a cloud rainbow whirligig umbrella that can be used as a business sign or address sign. The whirligig part of this is unusual in that it is a hanging whirligig. You must make sure to mount the fan blades of the umbrella at an angle for it to work properly. As with many of my other designs, this is a concept design and has not been tested or prototyped as of yet. The design is set up so that you can scale it to whatever size you need. Keep in mind that if you make the whirligig too large it may not work mechanically. The eye screws may have to be mounted differently than shown to offset the weight of the umbrella and rainbow. The left eye screw should probably be on the rainbow above the umbrella. You may also want to scale the umbrella down in size.
    It should also be noted that the umbrella by its self is a whirligig and can be used alone without the cloud and rainbow.

Friday, July 29, 2016

Steampunk whirligig / weathervane by Nevada crafter.com

    This is probably the most complicated whirligig design that I have created thus far. And as such I would like to stress that this is an untested design that may be better suited as a decoration indoors rather than an actual functioning whirligig or weathervane.
    The reason for the complexity is that it uses several different materials that are not usually incorporated into a whirligig. The design is a steam punk style and uses everything from wire, tubing and even wiremesh.
    I think it would look really cool using a copper mesh for the netting. The balloon itself is a simple oval 1/4" cut out painted gray to resembled the dirigibles used during the Victorian era. The guide wires or ropes will need to be some type of rigid wire such as brass welding rod or even bicycle spokes to support the balloon. Steam generator in the middle can be part wood but also could be just as easily fashioned out of a metal cut out. Tubing could be substituted with copper or brass wire. The steam gauge itself can be a sliced dowel painted silver and then applying a decal for the gauge and numbers. The ship body is cut out of 1/2" to 5/8" wood stock. The propeller is actually quite simple, in that it is a dowel using beads as a spacer and cap.
    The rest of the design is left open for your own imagination, such as the type and style of anchor that you wish to use or whether you would want to add any ports. I personally thought about drilling a hole in the side and then mounting glass marbles as port windows. You could probably use pipe fittings or even Sculpey clay for copper or brass fittings.

   If you have any suggestions or ideas please feel free to post them in the comment section. I'd be very interested in hearing people's input so I can make improvements on the design or future designs.

Please be sure and check out our website www.nevadacrafter.com and also check out our other blogs.
http://nevadacrafter.blogspot.com/

http://craft44.blogspot.com/

http://3dpenideas.blogspot.com/


Monday, July 18, 2016

Seagulls And Fruit Weathervane

Seagulls And Fruit Weathervane

The design can be used with any fruit or object you like and the birds need not be seagulls. It is basically presented to demonstrate a concept that involves using wind drag instead of a tail fin to control the direction of the weathervane. The number of birds is up to you. I recommend that you use spring steal so it does not loose it's shape and will give the birds more action in the wind.

Basic types of wind art and instruments

Description of basic wind art and instruments

This poster is intended to give a basic breakdown of the differences between the various wind art and instruments. This is also to clarify what I am talking about in the various blogs and the various terms that I use to describe what I'm working on. 


    Weather Veins are probably the oldest form of wind instruments. As time went by they evolved into more decorative forms and sometimes doubled as lightning rods as they were usually mounted on the tops of houses and constructed out of metal. 
    From this evolution arose the whirligig which not only functioned as a wind directional device but as a mechanical animatronic. Usually depicting some comic scene or action such as an old lady washing clothes or a mule kicking a prospector. Some whirligigs have also been adapted to create thumpers to chase away moles and gophers. Generally constructed out of wood there are not too many surviving antique whirligigs.
     Wind spinners or pinwheels are also among some of the oldest wind devices but were created more as a child's toy rather than decoration. When spinners are generally mounted on a short stick about 12 inches long or shorter. More recent designs are in the shapes of flowers and used as yard decorations.
     Weather stations are among the recent instruments created as a tool to monitor whether and meteorological events. Their sophistication now includes electronics that enable them to transmit information wirelessly, which allows them to be placed in remote areas and the unattended. 
    Kinetic art is the most recent addition to wind art and is generally constructed of metal. These works of art use the wind to create movement that is almost an optical illusions. They may also include wind chimes and solar lighting. Their design is more closely related to the wind spinners or pinwheels that children play with but on a much grander scale. They are generally omnidirectional which means they will operate no-matter the direction the wind is blowing.

This is a creation of www.nevadacrafter.com copyrighted 2016 not for reprint or republication without permission from Nevada crafter.com.

For other money making craft ideas be sure to checkout our other Blogs.


Saturday, July 16, 2016

Whale whirligig / weathervane

Whale whirligig / weathervane

This original design was conceived for use with the wood from fruit and vegetable crates that grocery stores discard, but due to the use of pesticides and other chemicals that may have been used on the wood I no longer use this wood source. The Woodstock that I use is 1/2" or 5/8 " and can be scaled to what ever size you need. 
    For the water spout I give you 3 options, although I used the copper wire the most as it was more cost-effective. 
    [Note] The difference between a whirligig and a weathervane is that a whirligig usually has a mechanical or electrical action to it, whereas a weathervane is usually just a figurine that tells the direction of the wind. A weathervane will also usually position the pivot post so that the figure( animal, person, object) is moving in the direction of the wind and not in the opposite direction. If you wish to use this as a weathervane simply move the pivot post back so that the whale will pivot as if he is traveling in the direction of the wind.

This is a simple basic design that can be modified numerous ways but it was made simple so as to increase profits and to allow me to compete with other crafters. The design can be spray-painted with one or two colors and not a lot of detail and still look good. 
    The fiber-optic version is a recent concept that I have not had a chance to fully work out. So if you attempt to create it please keep in mind that you may have to experiment with it in order to get it to work right. This version also increases the cost of materials which you may not be able to recoup even though all of materials for the lighted water spout can be found at dollar stores. The LED light is cannibalized solar yard light and the fiberoptics is cannibalized from a battery operated light.
    Still, it is a good project to challenge your skills at whatever level you happen to be at. The whales design was originally cut from a single piece of wood with a coping saw, which was a lot of work to just cut out the tail and very imprecise. At the time a coping saw is all I had, but when I later invested in a scroll saw I found it to be a worthwhile investment. A scroll saw makes quick work of it in less than a couple minutes.

Wednesday, June 29, 2016

Dragonfly weathervane

Dragonfly weathervane concept design


This is an untested design, so adjustments and alterations may be required. It is a basic design that could be altered so that a propeller could be added if you wanted to turn it into a whirligig. The pivot pin has been mounted as far forward as possible so that the dragonfly is always flying into the wind. It may be necessary to move the pivot pin slightly back for added strength depending on average wind speeds. Here in Nevada wind speeds can gust upwards of 60 miles an hour or more and may require that the wings be mounted more flat or even a downward slant to prevent dragonfly from being blown off the pivot post.
Although this design is presented for entertainment purposes it could quite easily be used as a pattern to create the actual weathervane.

Be sure and check out our website and other blogs for additional ideas and concepts.

www.nevadacrafter.com

http://craft44.blogspot.com/

http://nevadacrafter.blogspot.com/

Monday, May 23, 2016

Rocket astronaut jet pack whirligig

Rocket astronaut jet pack whirligig design

This is a concept design by  Nevadacrafter.com  
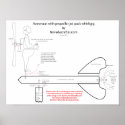
As I've stated before this is an untested design. But I wanted to include something new with this design, so I've made available a 16 x 12 print out that can be purchased from the following. 

Astronaut jet pack whirligig design poster
Astronaut jet pack whirligig design poster by Nevadacrafter
View Conceptual Posters online at zazzle

    The astronaut can be made fixed mount, but I think it adds additional character if he can wobble back and forth. The tail propeller is optional, but be sure and mount your propeller blades at an angle. The design can be modified in a number of ways, just use your imagination and give it a try.

Thursday, May 12, 2016

Flower kaleidoscope


The concept behind this design is to give a kaleidoscope effect. Each of the flower propellers rotate in opposite direction. If two drastically opposite colors are used such as black and white or yellow and blue, the effect is enhanced. The design of the propellers could also be applied to other designs in different combinations. Also keep in mind that this is not a pattern, it is a design concept. This way the design does not restrict you to a rigid pattern that can only be used for the one design.

Be sure and check out our website www.nevadacrafter.com here you will find links to our other blogs, YouTube videos and other posts. We hope that this post is informative and inspires you to create your own designs. Happy crafting from the Nevada Crafter.

Friday, April 22, 2016

Cat Watching Flower Whirligig Concept

Cat Watching Flower Whirligig Concept


Note: make sure flower petals are angled to form a propeller. It should also be noted that this is not a pattern but a concept as the drawing was not done to scale.


Friday, April 15, 2016

Carnival Ferris wheel whirligig

Carnival Ferris wheel whirligig

Note this is a concept and not a pattern. All copyrights are reserved by Nevadacrafter.com you are free to use for personal use only, not for reproduction, reprint, or republication.


This concept has not been done to scale and has not been tested and as such functionality is unknown. Theoretically, it should work but may require adjustments and further testing.


The idea is to use a double wheel as the Ferris wheel with the propeller blades inside the Ferris wheel. The cars on the Ferris wheel may require additional weight in order to get them to hang and rotate properly. The shaft that the propeller rotates on probably should be a metal screw or bolt. Be sure to use graphite as your lubricant so it does not freeze in the winter. Graphite from pencil lead may be substituted. The center hub is a 1"or 2" wheel in which the propeller blades are inserted into. The upper edges of the blades are slotted into the Ferris wheel and act as spokes for the Ferris wheel. The dowels that the cars rotate on also act as further reinforcement for the Ferris wheel itself. 
    Please leave constructive suggestions and ideas in the comments section. 

For this and other craft ideas please checkout our other sites and be sure to subscribe.
www.nevadacrafter.com

http://craft44.blogspot.com/

http://nevadacrafter.blogspot.com/

Nevada Crafter on YouTube

Monday, April 4, 2016

Fairy whirligig / weathervane concept

Fairy whirligig weathervane concept

This is a concept / idea of how the fairy silhouette may be used in creating a whirligig or weathervane. The idea is to use the Fairy as a rudder that will keep the dandelion pinwheel facing the wind. Fairy is positioned so as to give the appearance of her reaching out for the dandelion. This is all set on a standard 12 " X 3/8" X 1 1/4" inch base.

For this and other craft ideas please checkout our other sites and be sure to subscribe.
www.nevadacrafter.com

http://craft44.blogspot.com/

http://nevadacrafter.blogspot.com/

Nevada Crafter on YouTube